

How to Get Rid of Water Stains on Plaster and Drywall
Water stains on plaster and drywall can be unsightly and may indicate underlying issues such as leaks or moisture problems. Addressing these stains promptly not only improves the appearance of your walls but also prevents potential damage to the structure. Here’s a guide to effectively removing water stains from plaster and drywall.
Introduction
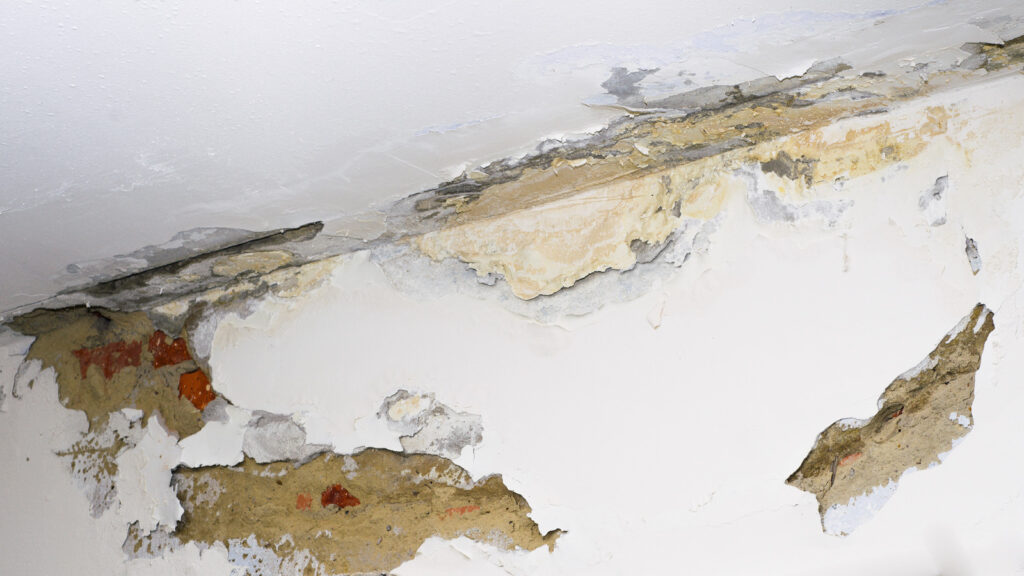
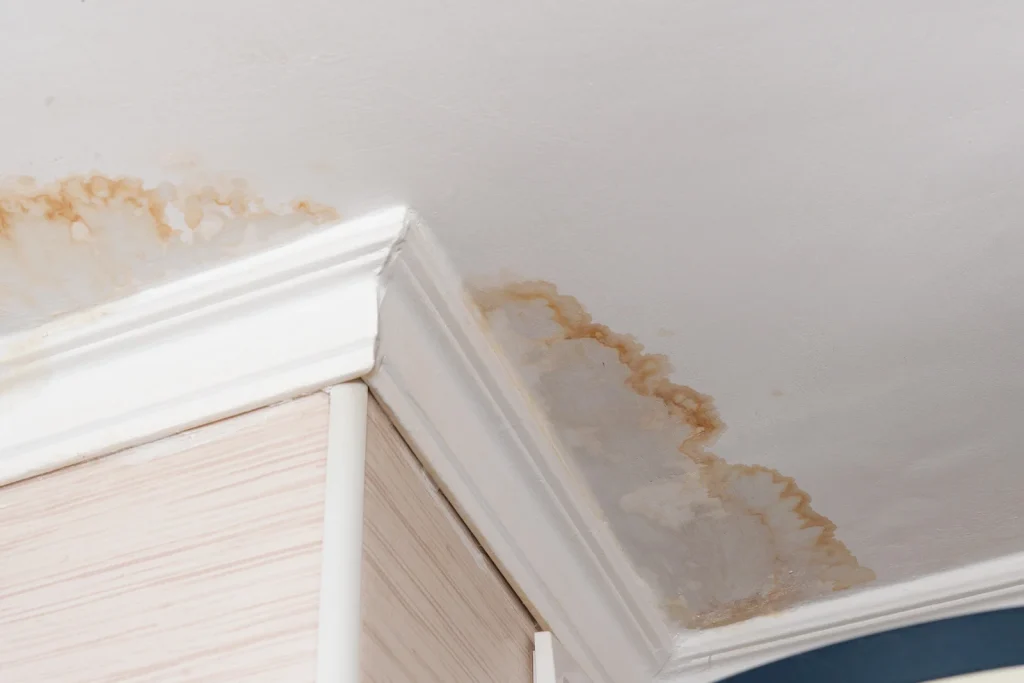
Water stains on plaster and drywall are typically caused by water infiltration from leaks, condensation, or plumbing issues. These stains can appear as discolored patches, often with a yellowish or brownish tint, and may be accompanied by mold or mildew growth in severe cases. It’s important to address water stains promptly to prevent further damage and maintain the aesthetic appeal of your walls.
the stage for understanding the importance and approach to dealing with water stains on plaster and drywall. It highlights the common causes of water stains, such as leaks or condensation, and emphasizes the impact these stains can have on the aesthetics and structural integrity of walls. The introduction aims to capture the reader’s attention by outlining the steps needed to effectively address water stains, emphasizing the importance of prompt action to prevent further damage. It provides a context for why homeowners should be proactive in managing and mitigating water stains to maintain the quality and appearance of their walls.
Assessing the Damage
Before proceeding with removal, assess the extent of the damage caused by the water stains. Determine if the stains are superficial or if they have permeated deeper into the wall structure. This assessment will guide the appropriate cleaning and restoration methods needed.
Assessing the damage caused by water stains on plaster and drywall is crucial to determine the appropriate course of action. Begin by identifying the extent of discoloration and any accompanying signs of mold or mildew growth. Check for soft spots, warping, or structural weaknesses in the affected area. Probe gently to assess if the damage extends beyond the surface. Understanding the depth and scope of the damage helps in selecting the right cleaning methods and repair materials. It also ensures that underlying issues, such as leaks or moisture problems, are addressed effectively to prevent future damage and maintain the integrity of your walls.
Cleaning Methods
Surface Cleaning:
Begin by cleaning the surface of the stained area using a mild detergent or soap and water solution. Gently scrub the stain with a sponge or soft brush to remove any surface dirt or debris.
Vinegar Solution:
Create a solution of equal parts white vinegar and water. Apply the vinegar solution to the water stain using a sponge or cloth. Let it sit for a few minutes to loosen the stain, then gently scrub the area. Vinegar helps to break down mineral deposits and organic matter from the stain.
Bleach Solution:
For stubborn water stains or mold/mildew growth, use a bleach solution. Mix one part bleach with three parts water. Apply the solution to the stained area and allow it to sit for about 15 minutes. Use caution when handling bleach and ensure adequate ventilation.
Repairing and Repainting
After cleaning the water stains, allow the area to dry completely. Depending on the severity of the damage, you may need to repair any damaged plaster or drywall. Use spackling compound or joint compound to fill in any cracks or holes. Once the repairs are dry, sand the area smooth and apply a primer suitable for stained surfaces.
Repairing and repainting water-stained plaster and drywall involves several steps for effective restoration. After cleaning and drying the affected area thoroughly, assess the extent of damage. Use spackling compound or joint compound to fill in any cracks or holes, ensuring a smooth surface. Sand the repaired area to blend it with the surrounding wall texture. Apply a suitable primer to the stained area to prevent bleed-through. Once dry, repaint the surface with matching paint to restore its original appearance. This process not only repairs structural integrity but also enhances aesthetic appeal, ensuring your walls look as good as new.
Prevention Tips
To prevent future water stains on plaster and drywall, address the underlying causes of moisture, such as fixing leaks promptly, improving ventilation in humid areas, and ensuring proper insulation around plumbing fixtures. Regularly inspect areas prone to water exposure, such as bathrooms, kitchens, and basements, to catch potential issues early.
To prevent water stains on plaster and drywall, proactive measures are essential. Start by addressing any leaks or sources of water infiltration promptly. Inspect and maintain your roof, plumbing, and gutters regularly to prevent water from entering the walls. Improve ventilation in areas prone to humidity, such as bathrooms and kitchens, to reduce condensation. Seal gaps around windows and doors to prevent rainwater from seeping in. Ensure proper insulation to prevent cold spots that can lead to condensation. By taking these preventive measures, you can significantly reduce the risk of water stains and maintain the integrity and appearance of your plaster and drywall surfaces.
Conclusion
Removing water stains from plaster and drywall requires patience and the right approach to ensure effective results. By following these steps and addressing the root causes of moisture, you can restore the appearance of your walls and prevent recurring stains. Prompt action not only enhances the aesthetic appeal of your home but also contributes to its overall structural integrity and longevity. Call Now